Thursday, 20 July 2006

Categorized recently updated blogroll links

Recently I've added a new feature to my blog. It is a blogroll for each of my 'link categories' in the sidebars. I had two criteria that needed to be met. Those being an easy way to add links and a way to indicate if they were recently updated.

It was a bit of a process to set up initally, but now it is a breeze to keep up. I used BlogRolling because they had the update feature. The downfall (only a downfall because I'm cheap) is the fact that with the free account you can only have one blogroll. The 'Gold' edition allows several blogrolls. I needed six, so my work-around was to open six gmail accounts (ie blogu.tweaks@gmail.com, blogu.templates@gmail.com, etc) . Then I opened six corresponding blogroll accounts (ie blogu.tweaks, blogu.templates, etc). Each of those matched a heading in my sidebar. Take a look at my sidebar to see it in action.

As far as upkeep, BlogRolling has a feature called 1 Click Blogrolling that puts a link in your Bookmarks or Links Toolbar. Click on that when you find a blog you wish to add to your blogroll. After you click on it, log in to the 'account/sidebar category' that you want the link to appear. That's it! Nifty, huh.

post signature

Sunday, 16 July 2006

FlickrFont

Using Flickr you can change fonts into a graphical graffiti extravaganza. Use it to design a different header or spice up a sidebar. It can be static or dynamic. But use it with discretion...it could become a visual nightmare! It is a little strange, in a 'crazed serial stalker' sort of way. But, none-the-less, it is interesting.

Here is a sample:

BLOG U

You can get your very own at FlickrFont if you have the inclination for the bizarre. Read more about it at Fresh FlickrFont From Feeds.

post signature

Wednesday, 12 July 2006

Freshtags - interactive and context sensitive tag / category menus

...This way, readers are more likely to see what they want and so stay on your site....From the Fresh Tags Main Page

I am using a new method for categories that I found called FreshTags v. 0.5 - Freshblog. It uses, del.icio.us, but it is not completely necessary for you to have an account.

One the features that I like the most is tag-grabbing. It scans your viewer's previous page for keywords that match your tags, or categories. For instance, if you do a search for "Blog U CSS/HTML" then click on the link, my blog will reflect this by making the 'CSS/HTML' category bold and displaying a list of all my posts related to that category. Pretty awesome! I'm still learning about what all FreshTags is capable of.

The FreshTags site has more detailed information. When you visit, play around in the 'Build' area to make your tags the way you like for your blog. It is simple to implement on your blog. There are three sections of code that your paste into your template, then you are done! Set back and watch the magic!

post signature

Two sidebars in blogger - Part 2

It was brought to my attention that I left out a bit of information needed to make the two sidebars work. If you haven't read Two sidebars in blogger - Part 1, read it first. The part that slipped my attention is buried deeper in the template. You have a section of code that should read:
<div id="sidebarleft"><div id="sidebar2">
Simply add this after all the content in your left sidebar:
<div id="sidebarright"><div id="sidebar2">

Be sure to add a matching </div> for each <div> that is added (that would be two for each sidebar) to close the tags.These are placed at the end of your sidebar code. Otherwise things will get crazy fast. Now you add content to that sidebar as you have before (ie where you want the content to be seen in your blog). Sorry I didn't notice that omission before.

With all that being said, it seems each blog has it's own idea of how it will allow another sidebar to be introduced into the mix. When I added the second sidebar to by blog, it was very simple...cut and paste and it was a done deal. I recently helped a friend add a second sidebar to his blog. He also uses the same template as I, Minima. For some reason, it was extremely difficult. But, after a few glasses of wine and sleeping on it, I managed to make it happen. So, there is no rhyme or reason (at least to me, a person with no training) for why or why not something will work. If you are trying to add a second sidebar to your blog and it is just not happening as you had hoped, email me and I'll see if I can help. Not promising anything, but I do enjoy a challenge.

post signature

Saturday, 1 July 2006

Backup your Blogger template

Over the past few weeks I've noticed an annoying behaviour with Blogger. It seems to remove large chunks of your template. A good backup is the remedy. There are some backup programs you can use like BlogCollector or BackupMyBlog to name a few.

Another promising one is HTTrack Website Copier which I am trying out. This program is a free, offline browser utility which downloads your blog to your computer for viewing when you're not connected to the internet. It will copy all web pages, images and reconstruct internal links for offline browsing. I like the fact that you can simply update the backup on your computer.

Another method that I have been using (and will continue to use until I decide to go completely with HTTrack Website Copier) is copy and paste your template into a notepad program, date the entry and save it on your computer. That has been a lifesaver for me. There have been countless numbers of times that my blog was missing large segments of content and I reinstalled the newest backup to correct the problem. Of course, the obvious problem here is how recent is your backup? My suggestion is to do a backup after any major additions to your blog. That will insure that all your work will not be lost in a blogger glich.

While researching this, I came across a couple of interesting articles with information on backups in general, including backing up your hard-drive. An excellent article can be found at Lifehacker, Geek to Live: Automatically back up your hard drive. Ask Lifehacker Readers: Best online backup service? has information from many of their readers. Also, PC World has an article, Store It on the Web. Just remember to read the warning if you decide to go with an online storage system.

The question should not be "Will I do a backup?". The question is "How shall I implement my backup program?".

post signature

Thursday, 22 June 2006

Correct comment count in blogger

My friend over at Beks and Ro, who is as picky as I am about her blog template, wanted to know how I got my comments to be 'correct'. Meaning if there are no comments it will say "0 comments" and if there is one comment it will say "1 comment" or if there are eight comments it will say "8 comments". Here is the code I inserted between the <Blogger> </Blogger> elements.
<MainOrArchivePage><BlogItemCommentsEnabled>
<a class="comment-link" href="<$BlogItemCommentCreate$>"
<$BlogItemCommentFormOnclick$>><script type="text/javascript">var a = <$BlogItemCommentCount$>;
if(a == 0) {document.write('No comment');}else if(a == 1){document.write('1 comment');}else {document.write(a+' comments');}</script></a>
</BlogItemCommentsEnabled><BlogItemBacklinksEnabled>
<a class="comment-link" href="<$BlogItemPermalinkUrl$>#links">links</a>
</BlogItemBacklinksEnabled></MainOrArchivePage>


post signature

Sunday, 11 June 2006

Tutorial: custom header for Blogger using GIMP

There have been several requests for help using GIMP to make a header for a blog. I'm not an expert on GIMP by any means, but I did make my header with GIMP...making me perhaps a one hit wonder. I shall relive that moment here in detail.

To begin with, you must have the proper items to work with. Those items being:
1. GIMP
2. Image(s)
3. Font(s)

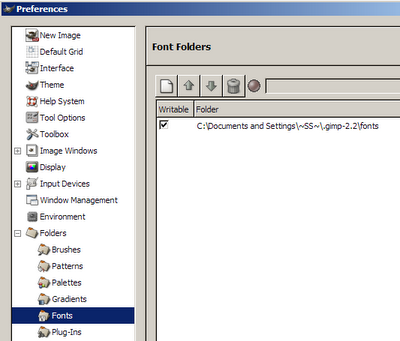
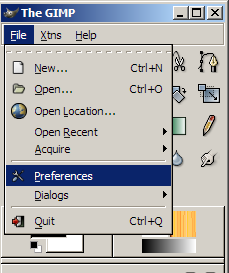
GIMP is great, but has a limited supply of fonts. If you want a different font than one offered in GIMP, you must find one, download it, and install it into GIMP. You must locate the directory that GIMP uses for fonts. To find that directory you must open GIMP. Click on 'File' and 'Preferences'. This will bring up the 'Preferences' box. In the left column click on 'Folder' then 'Fonts'. A Fonts Folder box will open up and show the directory that GIMP will search for fonts.Now that you know where GIMP looks for fonts...put some in there. I opened up the directory in Windows Explorer and dragged and dropped my font files. Simple. Restart GIMP and your new fonts will be available.
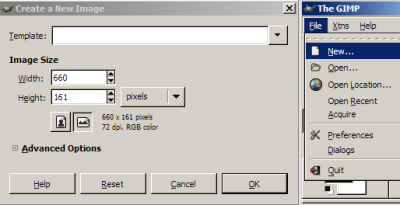
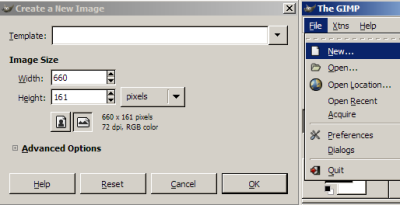
Now we can get down to business. Since we are making a header, we need to know the size. Click 'File' and 'New' to open up the 'Create a New Image' box. For this tutorial I'm using 593 x 159 pixels so that it will fit in my blog post. The size of the header on my blog now is 660 x 161. Put your sizes in the 'width' and 'height' boxes.Click 'OK'. A new blank screen will popup. That is our drawing board.

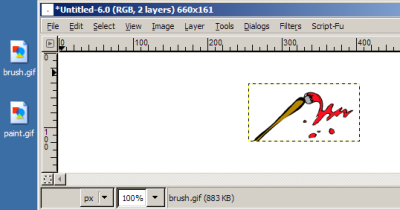
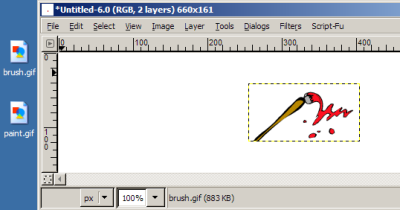
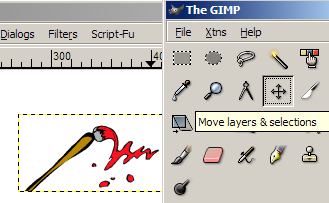
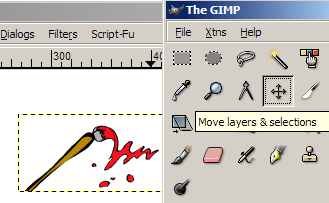
At this point I clear my desktop except for the images I want to use just for ease of working. First we'll add the images to the drawing board by right clicking on the image and dragging and dropping it in the box.It will land right in the middle. So, unless you want it there, it has to be moved. Go back to the main GIMP application and click on the little crossed arrows. Then move your cursor on the edge of the dotted line of the image and move it where you want.
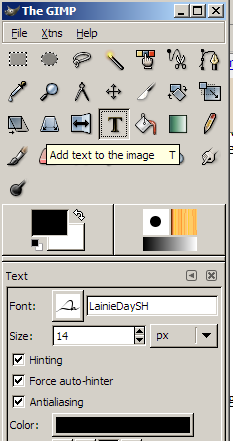
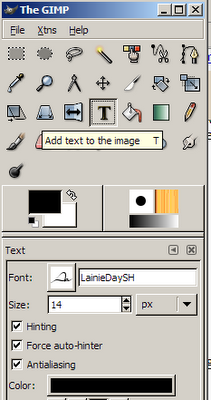
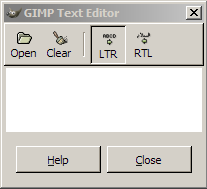
When you are happy with image placement, it is time to add the title and any description you want. (Remember, you can always move the images and lettering layers later if you need to.) On the main GIMP application click the 'T' and select your font from the drop down list below. You can change the size of the text and color in the field below. Click approximately where you would like the lettering to begin in the drawing board area and a small popup window will appear. That is where you type in the text. If things aren't lined up properly, click on the crossed arrows and drag the 'layer' where ever you want.
Now, save your header by clicking 'File' and 'Save As'. Give it a name and file extension. (I've been using PNG.) It may say something about export...just let GIMP have it's way and export and if it says anything else, agree again and click 'OK'. Then everyone is happy.

Here is the result of my practice header.

If you need a little help getting that header into your blog, you may want to look at these posts The GIMP: new custom header and The GIMP: new custom header (Part 2).

I think I covered everything needed to make a simple header/banner using GIMP. Experiment with it! Here is a tutorial for GIMP with more indepth instructions on it's use. If by chance you use my tutorial to make a header for your blog, leave a comment with a link! I would love to take a look.

post signature